
Data loss can have disastrous consequences. That's why it's essential for businesses and individuals to control and secure their data. And there's nothing better than backing them up on your own premises.
As a’Plesk host, LRob offers robust solutions for automating backups and guaranteeing data protection through this hosting panel. If you want the best performance, don't hesitate to choose one of our our Plesk hosting offers. This tutorial will guide you through the steps required to back up your data hosted via Plesk to a home or professional NAS (Network Attached Storage).
As equipment can vary, the aim will be to give you the general principles concerning your NAS and network configuration, but to be very precise about the configuration at the Plesk level.
Prerequisites
Before you start, make sure you have :
- A NAS with FTP support.
- Ideally an operator that allows you to have a fixed public IP address (for Orange you need Orange Pro with the free fixed IP option active, for Free you need to ask for a fullstack IP, for SFR and Bouygues I don't have any information).
- If you don't have a fixed IP, you'll need to set up a DynDNS service. DynDNS example.
- Some basic network concepts: local IP, public IP, network port, domain name.
The main principles: creating FTP access and port forwarding via NAT
To transfer your backups from Plesk to a NAS, you'll need to create an FTP access and make it accessible on the Internet.
A few basic concepts: We say that each service on a server «listens» on a «port», which makes it possible to direct (via a NAT rule on your router) Internet traffic destined for one service rather than another. The challenge will therefore be to redirect the traffic destined for the ports corresponding to FTP to your NAS located on your local network.
Create FTP access
Creating FTP access depends on the model of your NAS. If necessary, refer to the official documentation for your NAS.
For ports, the default control port is 21. For passive FTP (recommended), the default port range is 49152-65534.
Here is a general procedure for Synology and QNAP NAS, two popular brands.
For a Synology NAS :
- Connect to the DSM interface on your NAS.
- Go to «Control Panel» > «File Services».
- Activate the FTP service and configure the settings (default port: 21).
- Create a user with FTP access permissions.
For a QNAP NAS :
- Log in to the management interface of your QNAP NAS.
- Go to «Control Panel» > «Applications» > «FTP Server Station».
- Activate the FTP server and configure the necessary settings.
- Create a user with the appropriate FTP permissions.
Redirecting ports
The port forwarding procedure varies depending on your operator or router. Here are the general steps:
- Access your router's administration interface. The most common default URLs are: http://192.168.1.1 http://192.168.0.1 http://192.168.1.254 http://192.168.0.254
- Make sure you have defined a static IP lease for your NAS so that its local IP always remains the same.
- Find the port forwarding section (often in «Advanced» or «NAT/PAT»).
- Add a new TCP rule to redirect port 21 (or the port configured for FTP) to the local IP address of your NAS.
- Add a new TCP rule to redirect the port range 49152-65534 to the local IP of your NAS.
- Save your changes.
Good to know:
- At Orange on recent Liveboxes, ports 50222 and 50805 are unavailable. You will therefore need to do three port forwarding ranges: 49152-50221, 5023-50804, 50806-65534. Doc Orange.
Point a domain name to the IP or use DynDNS
To make access to your NAS easier, you can use your domain name to point to your fixed IP.
If you have a fixed IP, go to https://ip.lafibre.info to get to know her.
Then configure a sub-domain to point to your fixed IPv4. Specifically, you need to create an «A» record in your DNS manager (if you're hosted by LRob, go to your Plesk control panel, the desired domain, «Hosting and DNS» then «DNS») to point to your fixed public IP address.
For example: office A 128.42.16.XXX
If you use DynDNS, then you can make a CNAME instead.
For example: office CNAME monsuperdyndns.dyndns.fr
Setting up automated backup via Plesk
Finally, configure automated backups in Plesk.
Start by connecting to your Plesk control panel.
If you are a reseller (offering several domains) or an admin, go to Tools & Utilities > Backup Manager
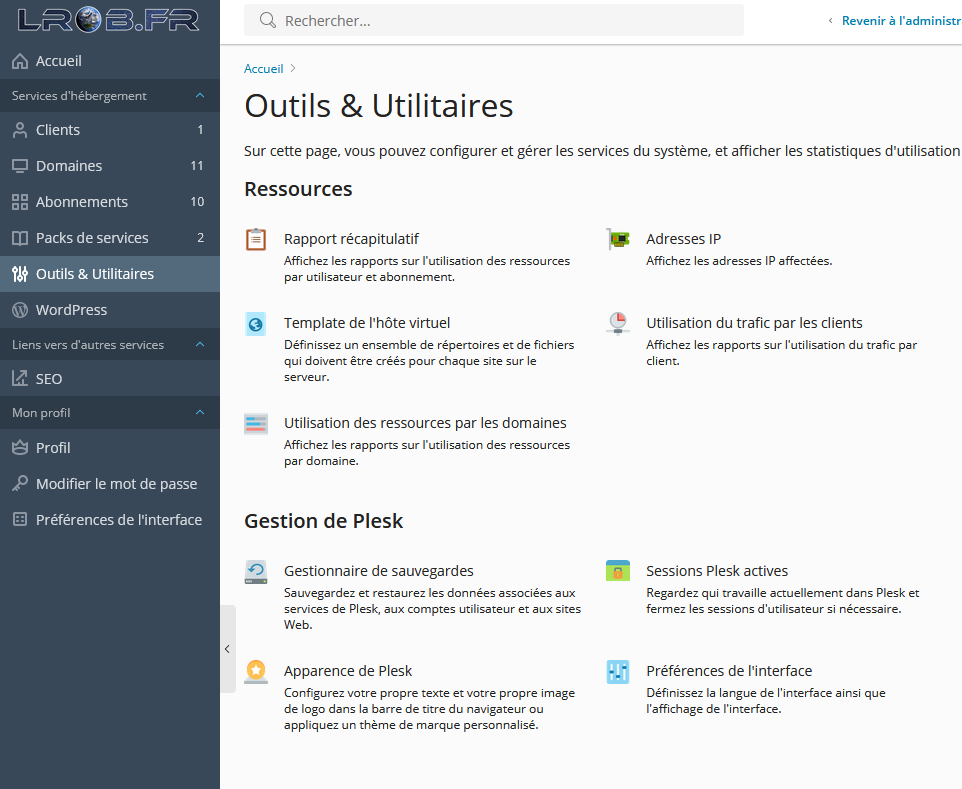
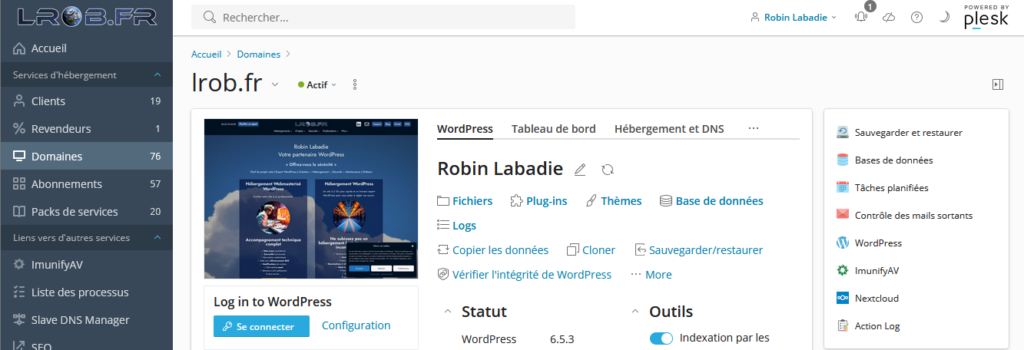
If you only have one domain, go to the page for the domain in question and then, in the right-hand pane, choose «Backup and restore».
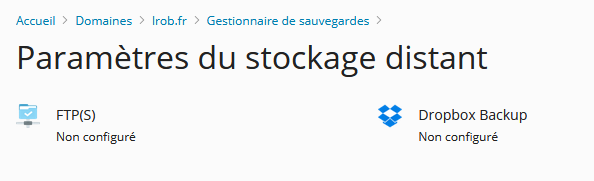
Click on «Remote storage settings».

Then click on «FTP(S)».
Enter your FTP access details:
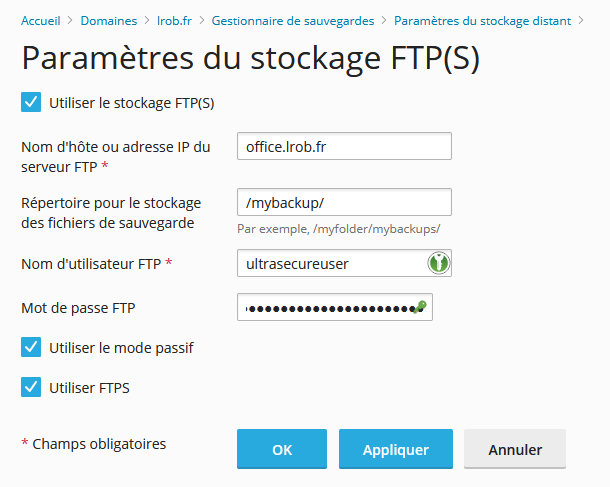
Then confirm with «Apply» (or «OK», which will take you back to the previous page once the change has been applied). Access will be tested. If the service is not correctly accessible from the outside or your user does not have sufficient permissions, you will get an error and you will need to correct your configuration. For passive mode and FTPS, this must of course be configured beforehand in your NAS settings.
Return to the Backup Manager page, but this time choose «Schedule».

Set up your backup, preferably at night, incrementally, with a full backup every month. The maximum number of backups should not exceed 12. Make sure you choose a value that won't fill your NAS completely.
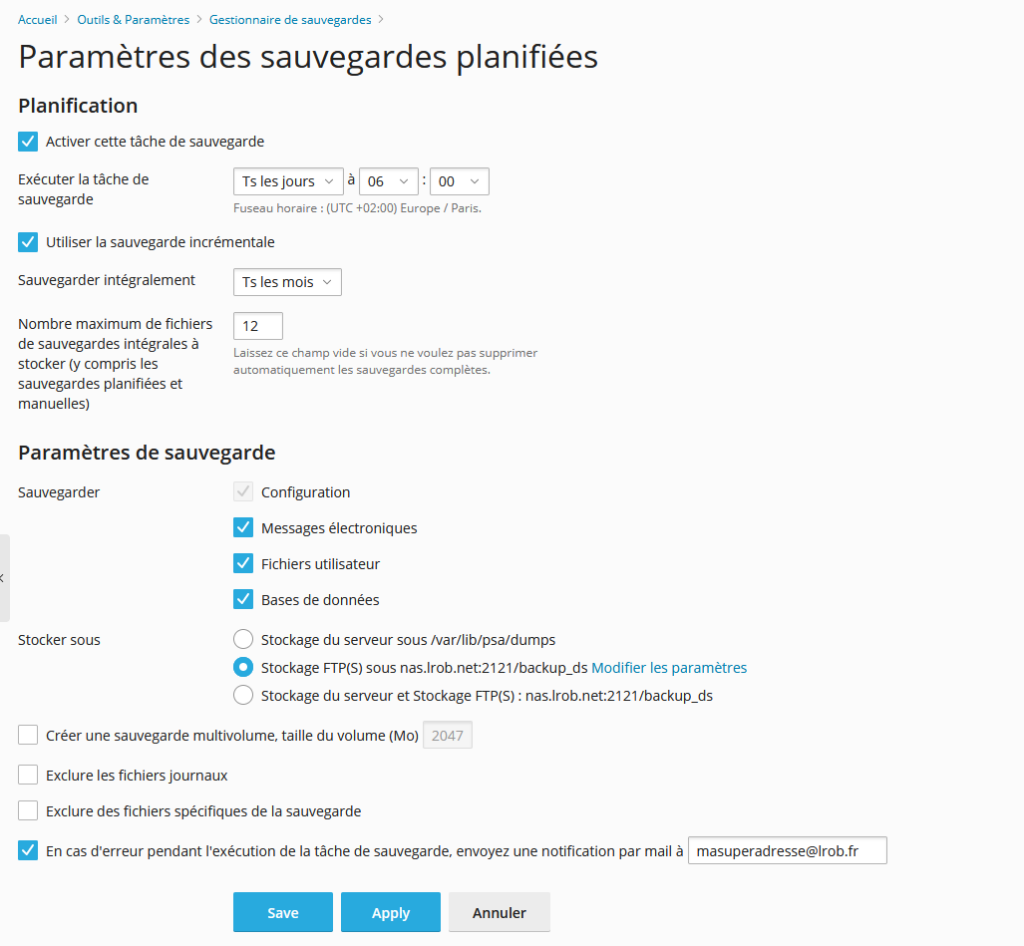
Confirm with OK.
Check the next day whether you have any backups. If everything is OK, after a while it should look like this screen:
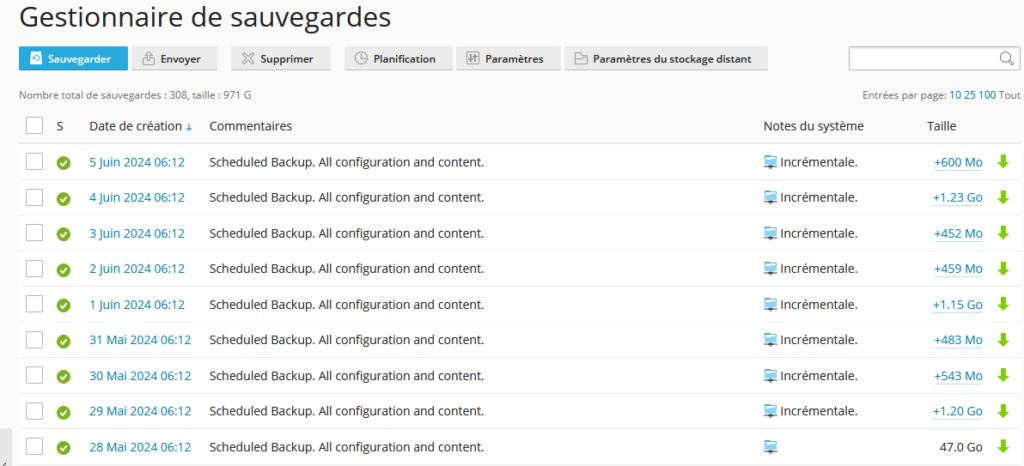
By following these steps, you will have put in place a robust solution for backing up your data hosted on Plesk to your NAS, thus ensuring its security and availability when needed.
And if you thought Plesk was performing well, just wait until you see the LRob servers! If you're in France, Belgium, Germany or Switzerland, you'll be happy to see a response times up to 4x faster than Plesk VPS on our hosting packages!
Leave a Reply
You must be logged in to post a comment.